If you use Jira in your team’s localization workflow, you can now automatically create, update, and close tasks with Transifex’s newest Jira integration.
I’m going to walk you through a simple use case here on how you can automate the creation of a Jira issue, with the click of a button from within the Transifex Editor. A bonus step is available on our blog where we go over automatically updating, and closing tasks too.
Prerequisites
- A Zapier account
- A Jira account
- A Transifex account
Step #1: File Preparation in the Transifex Editor
For this demo, we’re going to use a simple HTML file as the source for our translations. Feel free to download it from here.
First, let’s create a project and choose French (France) as the target language, and upload the HTML file:

Once you successfully uploaded your HTML file, click on Translate and select the language you would like to create an automation for, in our case French (France)(fr_FR). You will now see the strings in the Transifex Editor:

We have now prepped the file for localization, and we can start creating our zap over on Zapier.
Step #2: Setting up the Transifex Trigger in Zapier
If you haven’t done so already, you can create an account on Zapier, which is free forever. For this demo, you do not need a paid Zapier account.
Once created, head on over to your zap editor by clicking on Create Zap and choose the latest release of Transifex as a trigger:

You will then need to connect your Transifex account to Zapier by generating a Transifex API token from your User Settings page and entering it in the Zapier window. Please make sure you save your API key somewhere secure, as we’ll permanently hide it after you close the window. You can always regenerate a new one at any time.
We can now start creating the trigger for our zap.
Find your organization and the desired project from the dropdown options, and choose “Task for a Set of Strings” as an event. Then, choose “Triggers whenever a set of strings is selected for a task” as an event trigger. Test the trigger and click Continue .
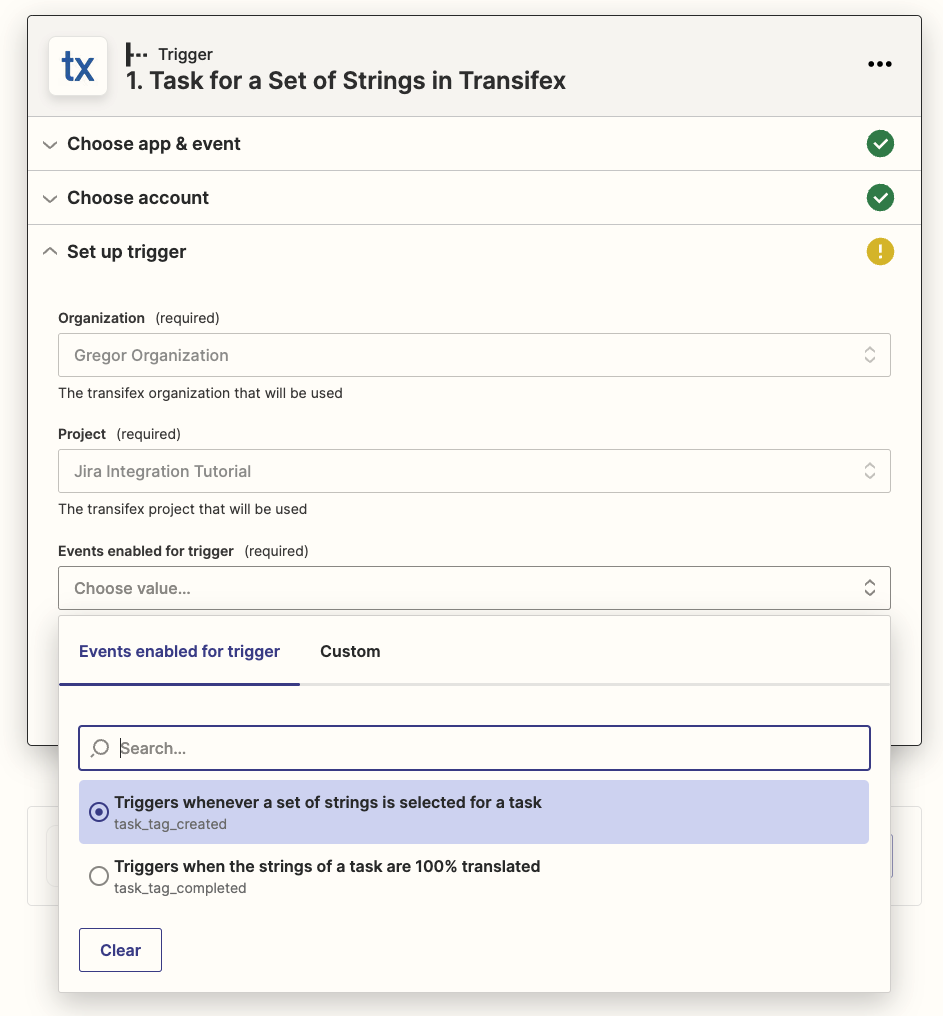
Test your trigger then click on continue.
Step #3: Creating the Jira Action in Zapier
We will now create the action that will occur when you run the automation in your Transifex Editor. In the next Action step in Zapier, search for Jira Software Cloud.
Choose “Create an Issue” as an Event and connect your account.
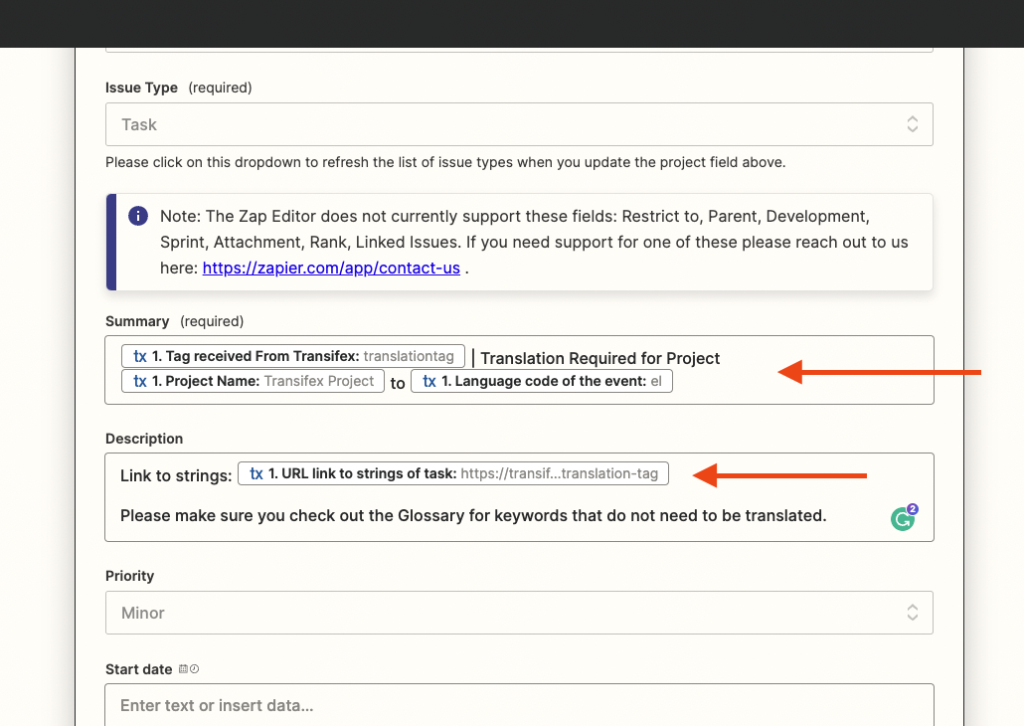
We will now input the “Tag received from Transifex” in the Summary of the task and the Reporter (both required), followed by whatever custom text and variables we might want to send.
We recommend adding the “URL link to strings of task" variable in the Description of the task to make it easier to find the corresponding strings:
Test, publish and turn on the Zap by following the subsequent steps.
Step #4: Run Your Automation
To start using your newly created automation, go back to your Transifex Editor and choose the strings you would like to create a task for, and click on “Create task” under Bulk actions.
If successful, you will get a notification with the specific tag allocated to this group of strings:

You will now see an automatically created task in the connected Jira project.
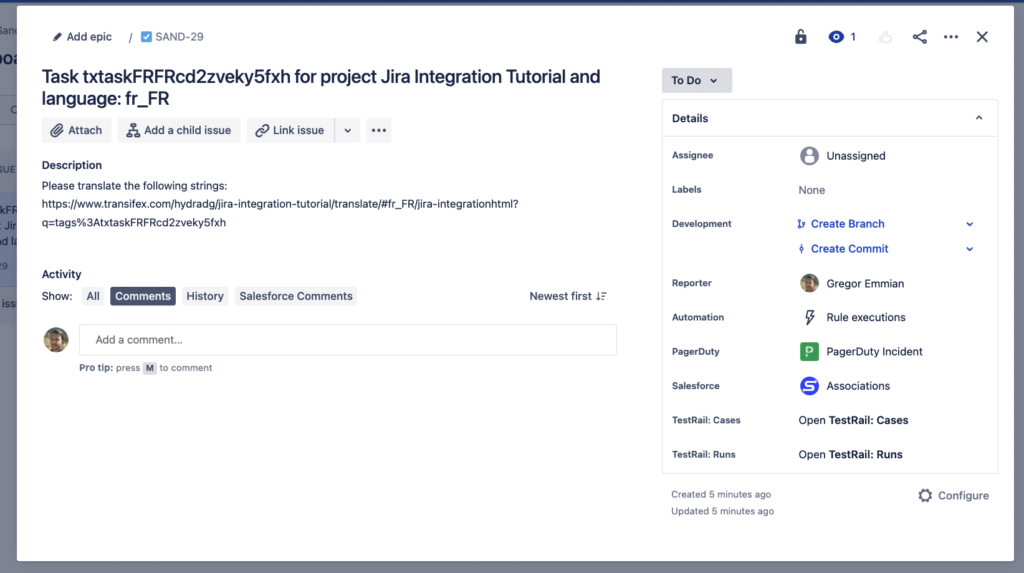
After assigning this task to the translator, they will be able to redirect to the Transifex Editor just by clicking on the link inside the Jira task. Only the relevant strings to be translated will be shown to them.
We also included a bonus step where the Transifex Jira integration will also take care of closing tasks once the corresponding set of strings is 100% translated. You can read about setting it up in our blog.